
shをデバッグするのに、デバッガを利用できないものだと思っていませんか?!
だがしかし!実はできるんです!
そう・・・VSCodeならね!!
サーバサイドエンジニア の方はsh使う人もたくさんいて一度はデバッガとかないかなーとか思ったことあると思います
実は私もそのうちの一人でした
今回はVSCodeでデバッガ構築を行い、shをデバッグできるようにする方法についてを紹介します
この記事を読むことでVSCodeでshのデバッガ構築が簡単にできるようになるので、是非一度構築してみてはどうでしょうか?
VSCodeにshデバッガ構築してデバッグする方法(Windows)

- WSL(Windows Subsystem for Linux)の導入
- Windowsの場合、これ入れないとVSCodeに怒られます
- VMWare使ってる人は注意、これを使えるようにするとVMWareが動かなくなります→後述します
- WSLのdistributionを導入する
- VSCodeプラグインをインストールする
- Bash Debug
- Remote – WSL
- さぁSHデバッグをしよう
WSL(Windows Subsystem for Linux)の導入
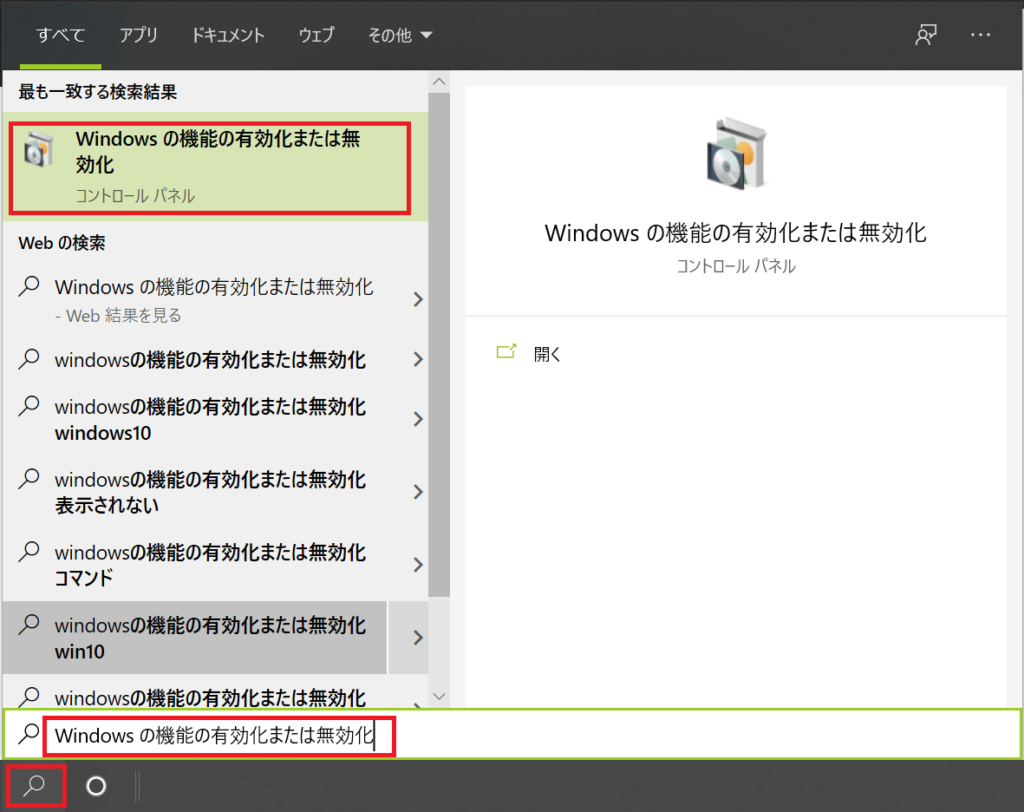
- 検索窓で「Windowsの機能の有効化または無効化」を入力してクリック
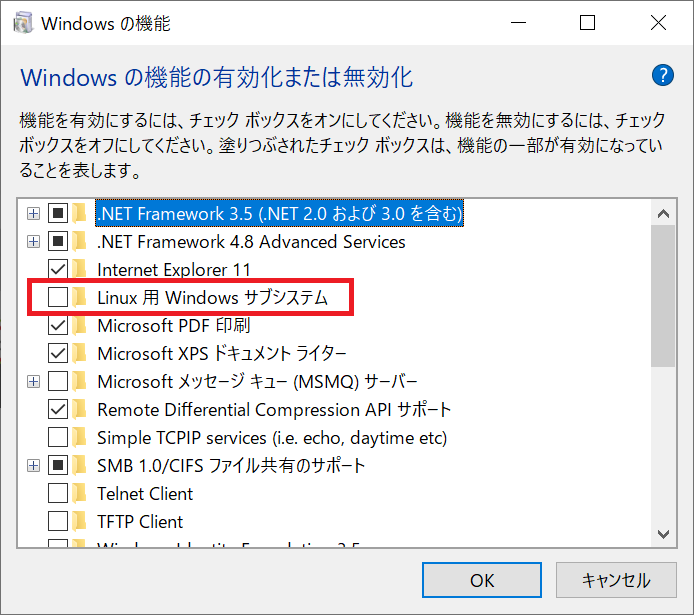
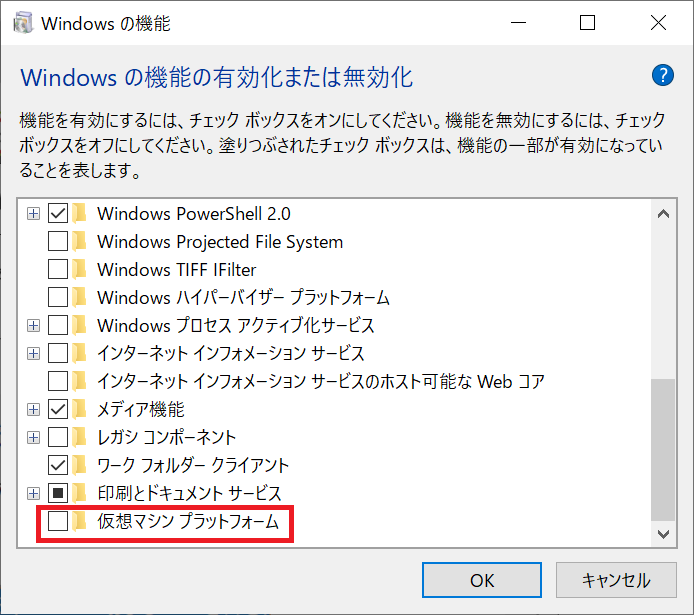
- 「Linux用Windowsサブシステム」と「仮想マシンプラットフォーム」を選択してOKをクリック
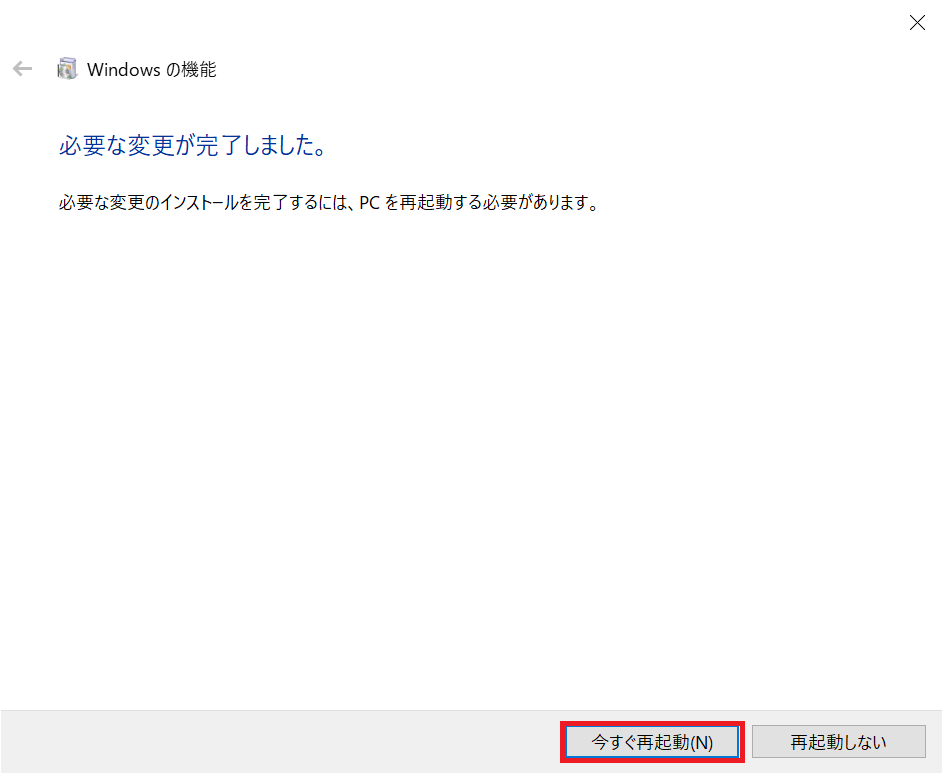
- 必要な変更が完了になったら、再起動します
Windowsの場合、これ入れないとVSCodeに怒られます
VSCodeのBash Debugプラグインで、WSLが有効になっていないとSHのデバッガが動作しないので実施は必須です
VMWare使ってる人は注意、これを使えるようにするとVMWareが動かなくなります→後述します
すでにVMWareを使っている方は注意が必要です
この機能を有効にしているとVMWareが動きません
同時に使用することはできないのでVMWareを使いたい方はこれをオフにしてください
WSLのdistributionを導入する
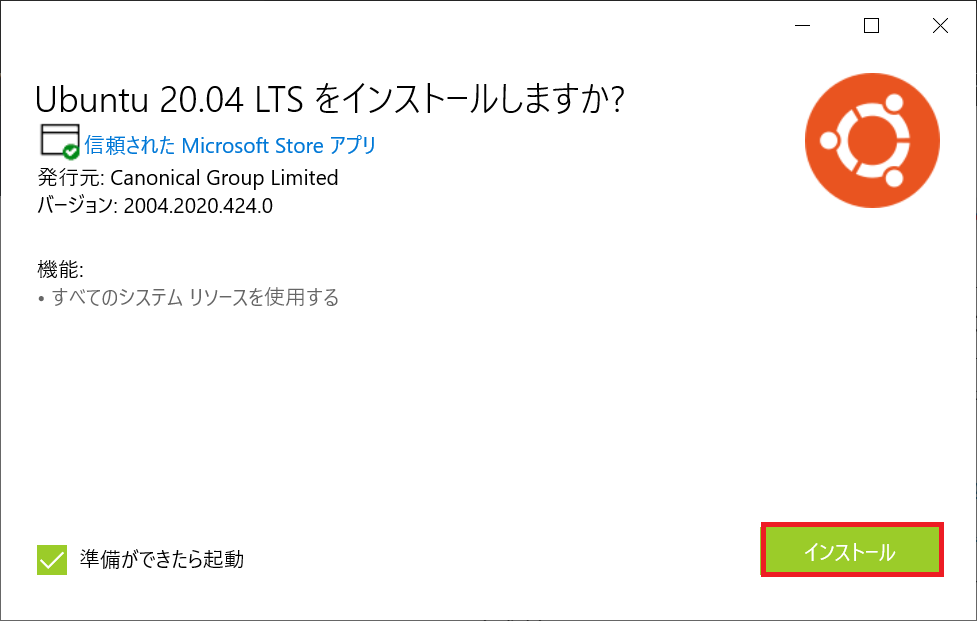
- 本家サイトの「Downloading distros」から好きなdistributionをダウンロードする※今回はUbuntu 20.04を選択
- ダウンロードした「Ubuntu_2004.2020.424.0_x64.appx」をダブルクリックで実行
- インストールをクリック
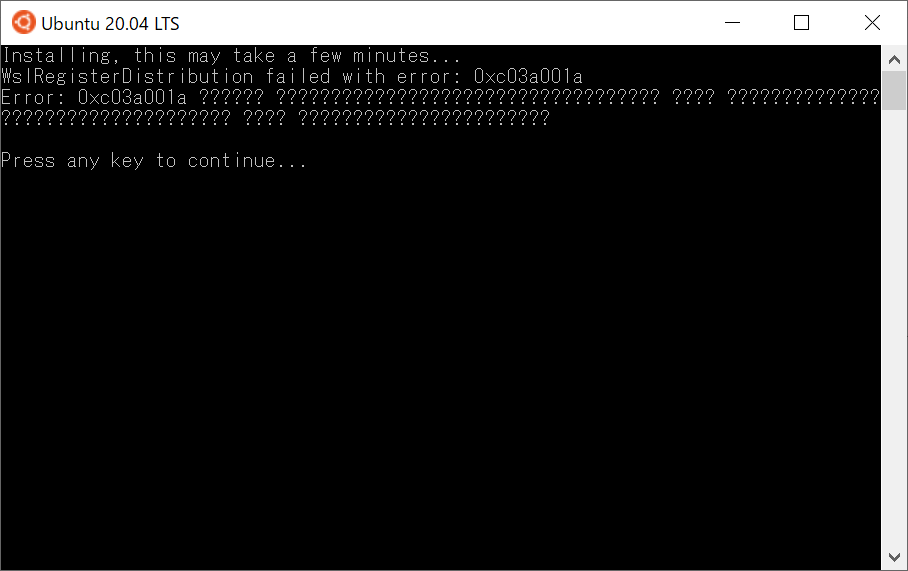
- 起動されるとこんな感じのエラーが出ます
WslRegisterDistribution failed with error: 0xc03a001a
Error: 0xc03a001a- 実際に出たエラーは以下
- これを解決してくれてるものがありました
Go to C:\Users\user name\AppData\Local\Packages folder. If not apparent, it’s probably hidden. Once inside directory, search subdirectory with ‘ubuntu’ string/keyword. Once located, right click the directory > Advanced > uncheck the compression > Apply. Now the ubuntu directory should have the arrows removed, which means you should have a better chance at actually running the distro install.
https://github.com/microsoft/WSL/issues/5325
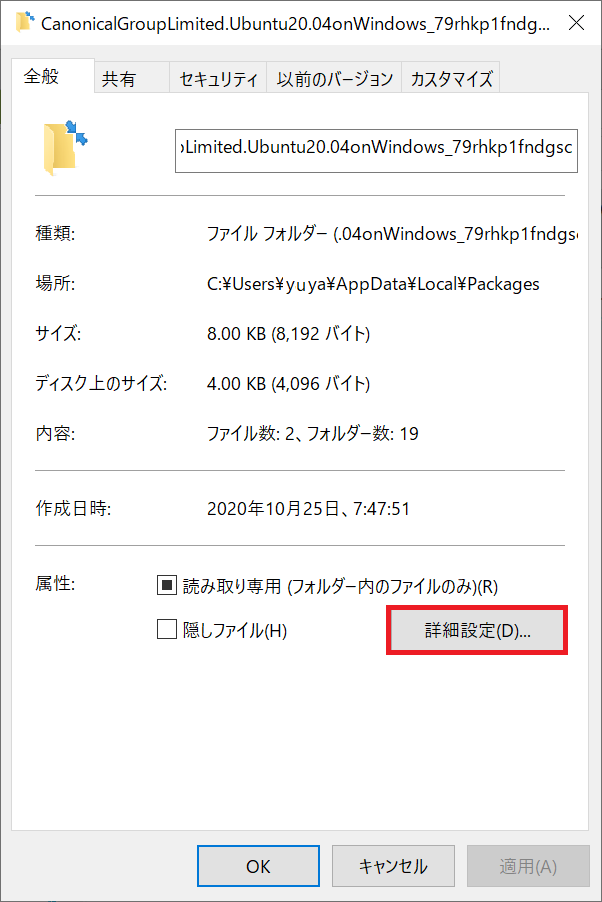
- 要するに、以下のディレクトリに移動して
C:\Users\ユーザ名\AppData\Local\Packages
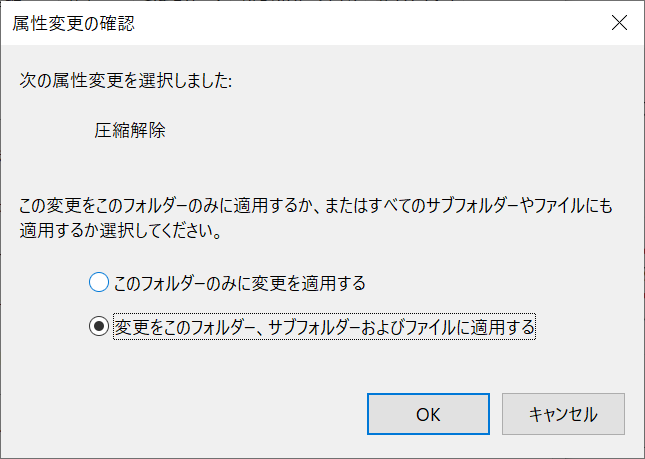
- Ubuntuを検索して出てきたフォルダを「右クリック>プロパティ」をクリック

- 詳細設定をクリック
- 開くと以下のようになっているので、「内容を圧縮してディスク領域を節約する」のチェックを外してOKをクリック
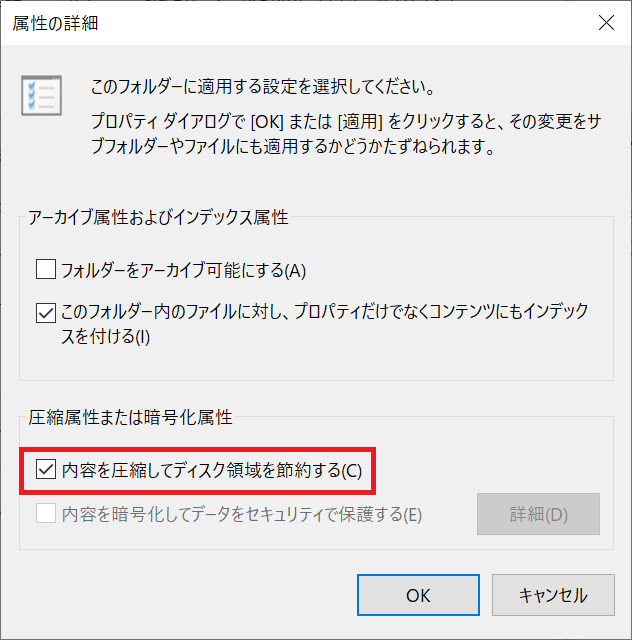
- その後適用をクリックすると以下の画面が出るのでOKをクリック
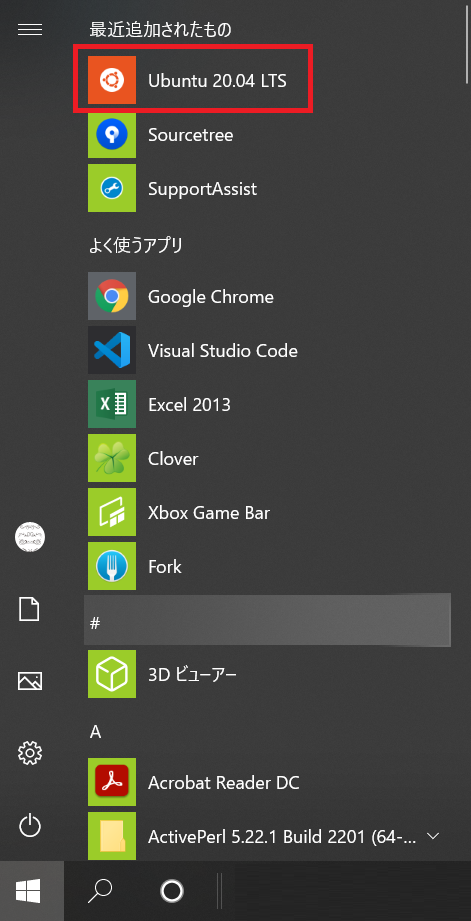
- Windowsアイコンをクリックして、Ubuntu 20.04 LTSがあるはずなので、クリック
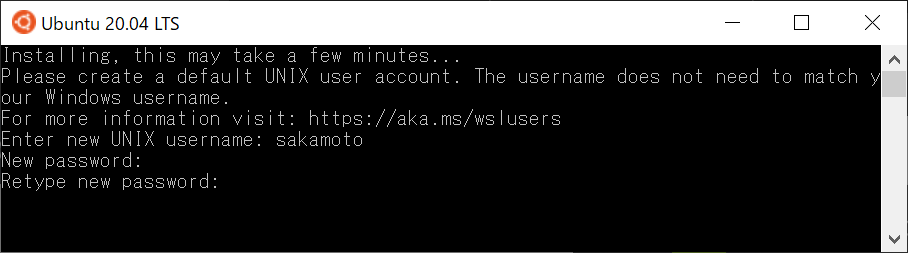
- 今度は成功します
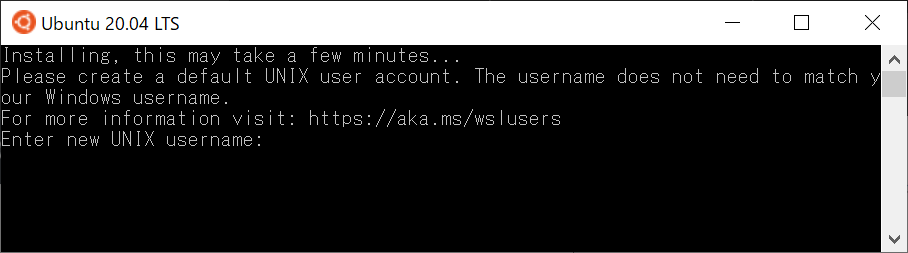
- usernameとpassword、再度passwordを打つと成功します
VSCodeプラグインをインストールする
- VSCodeで以下のプラグインを入れます
Bash Debug

Remote – WSL

拡張機能(プラグイン)のインストール方法がわからない方はこちらのサイトが参考になります
さぁSHデバッグをしよう
準備ができたところでいよいよSHデバッグをしていきます
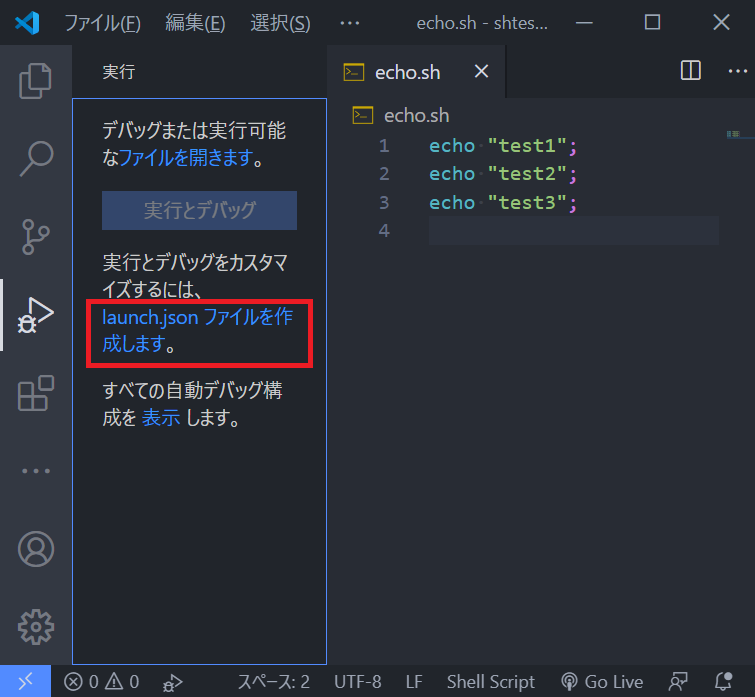
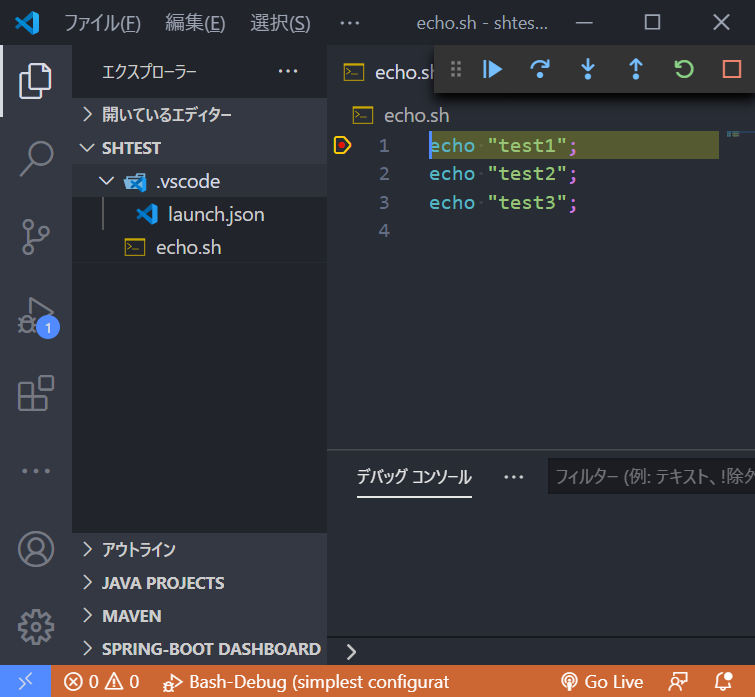
- SHTESTというフォルダに「echo.sh」というファイルをつくります
echo "test1";
echo "test2";
echo "test3";
- デバッグに必要なファイルを生成していきます
- VSCodeのデバッグアイコンをクリック

- 「launch.jsonファイルを作成します」をクリック
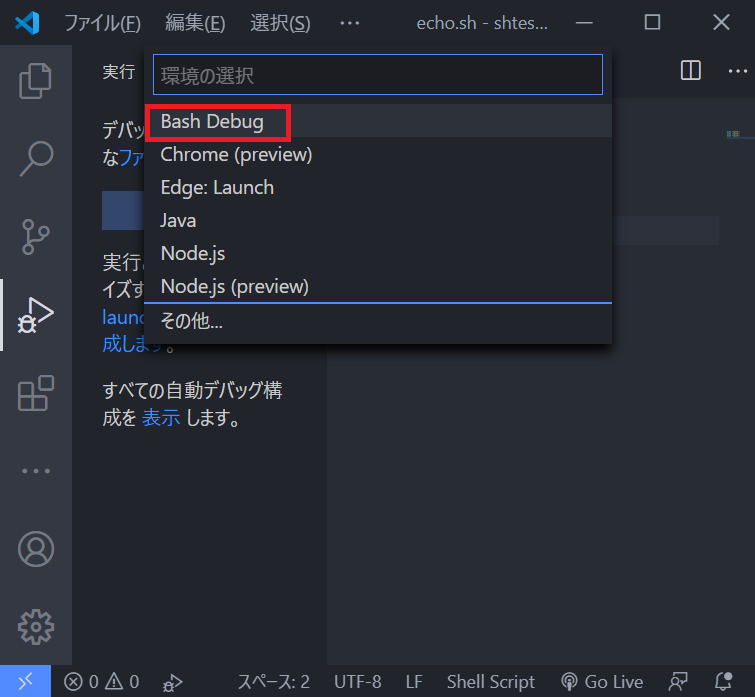
- 「Bash Debug」をクリック
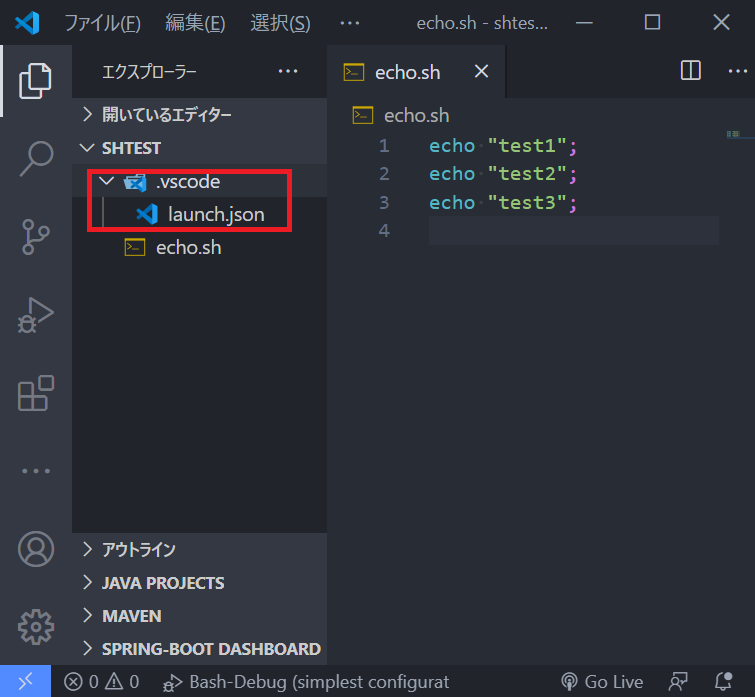
- .vscode > launch.jsonが生成されます
- この状態が出来たらSHデバッグの準備ができてます
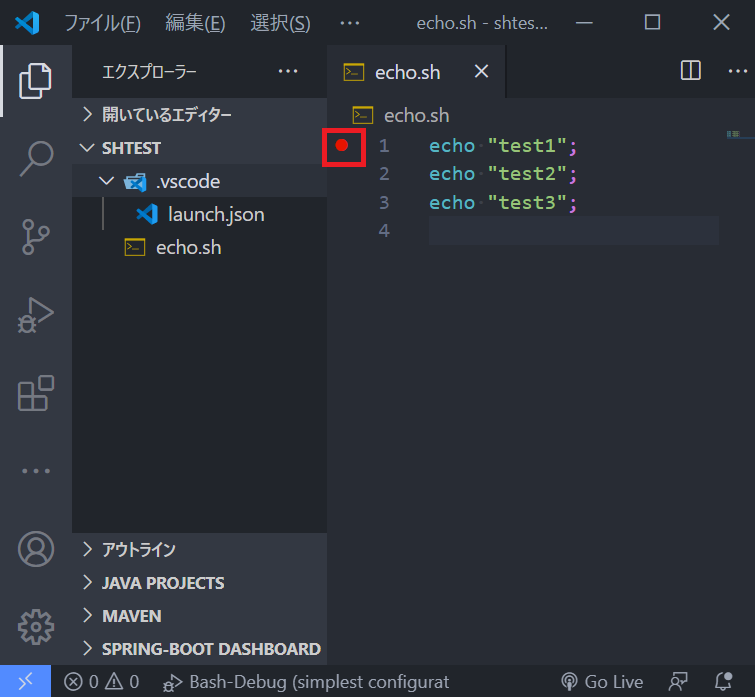
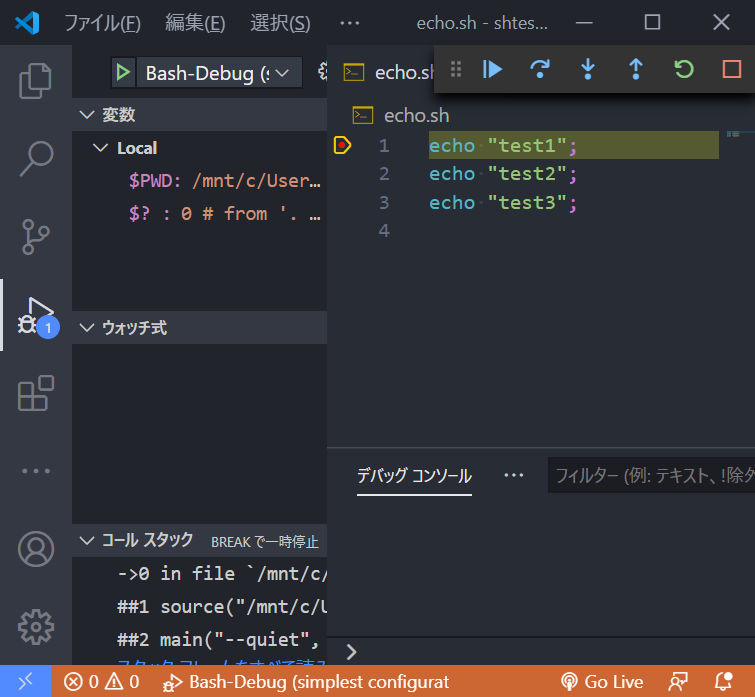
- ブレークポイントを張ります(赤枠部をクリックすると赤●の点がつきます)
- F5で実行します(このときデバッグコンソールも出しておきましょう、下にカーソルを当ててドラッグして上に引っ張れば出てきます)
- デバッグアイコンをクリックして切り替えると詳細が見れます
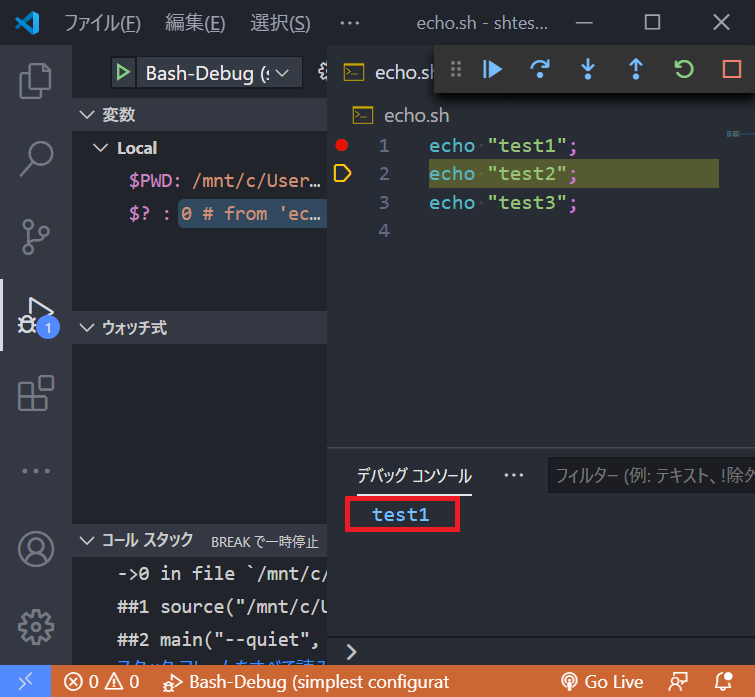
- ステップオーバーします(赤枠部をクリック)

- 実行するとデバッグコンソールに結果が表示されます
いかがでしたでしょうか?
VSCodeのデバッガを利用してSHのデバッグが簡単にできましたか?
本記事を読んでいただいて構築するだけでも価値はあるかと思います
実際に私もプロジェクトで運用していてかなり便利と思っています
まずは本記事の通りに環境構築を行って運用してみてはいかがでしょうか